1. Log in to your BT Cloud Work Portal. See Log in to the BT Cloud Phone Using Email or Phone Number for more information.
2. On the Admin portal, navigate to Tools > Directory integration.
3. Below Select directory provider, select Active Directory.
4. On the Okta setup section, click Enable Active Directory below Step 1.
5. Click Confirm on the dialogue box.
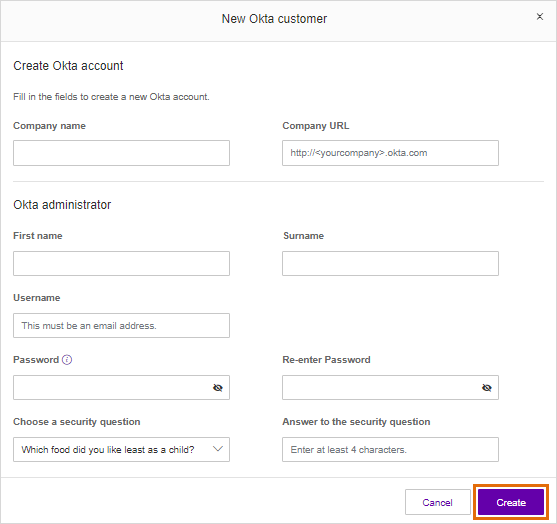
6. Below Step 2, click Become an Okta member. Skip this step if you already have an Okta account.
7. Fill out the information required, then click Create.
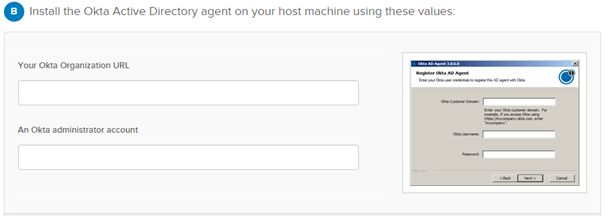
8. Once you have created an Okta account, log in to Okta, then click Download Agent.
9. When installing the Okta Active Directory on your host computer: Provide your Okta Organisational URL and Okta administrator account.
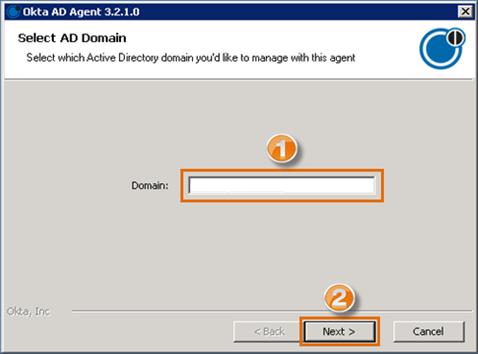
10. Enter the Active Directory domain, then click Next.
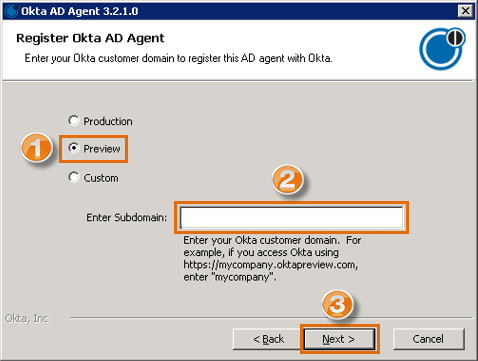
11. Select your org type (Production, Preview, or Custom), then enter the subdomain. Click Next.
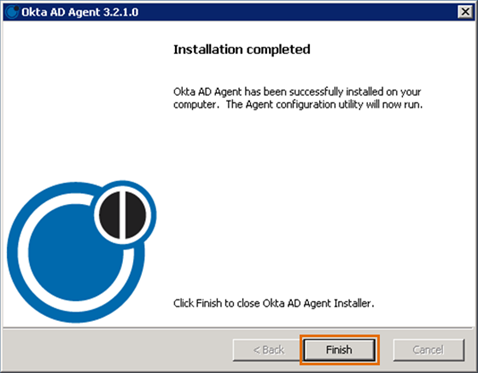
12. Click Finish.
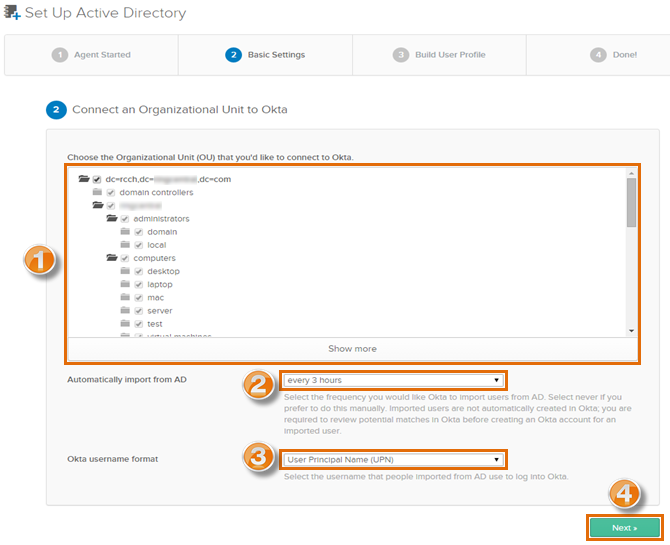
13. Go back to the browser page from which you downloaded the Okta Active Directory agent. Select the Organisational Units you want to import from, the import frequency, and the username. Click Next.
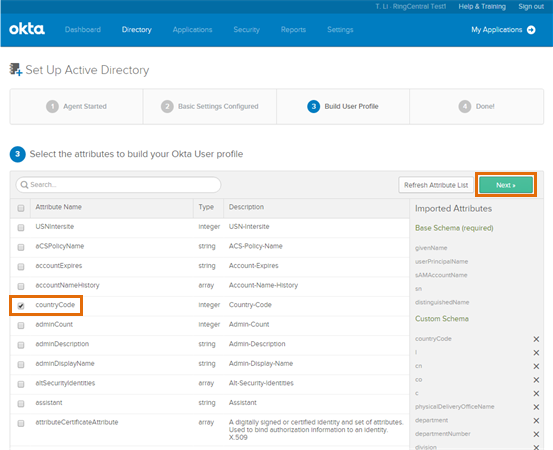
14. Select the Attribute Names from Active Directory which you prefer to be included in your Okta User profile. Click Next.
NOTE: Use the Search box to easily find Attribute Names.
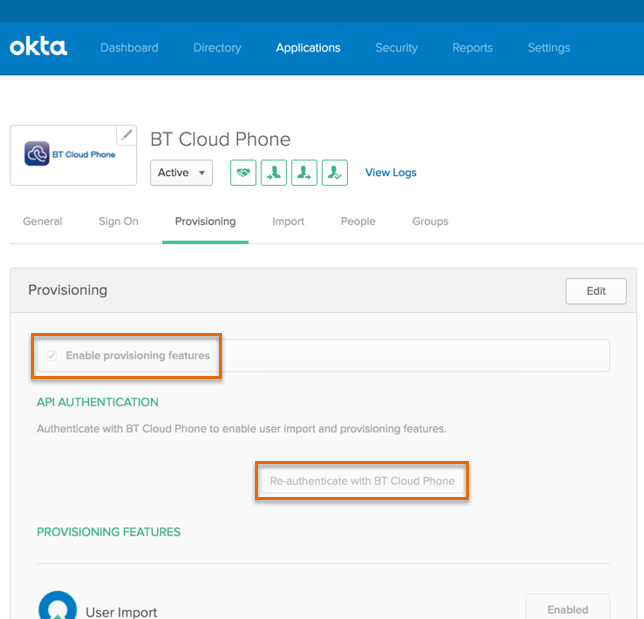
15. Check Enable provisioning features and click Re-authenticate with BT Cloud Work. If the valid credentials are provided, the Okta page will display a green button indicating authentication is successful.
This completes your Active Directory integration with Okta. Your users can now sign in to Okta with their Active Directory credentials.

